Right…so this is going to be my attempt at a tutorial on the animation function in Adobe Photoshop CS3…pretty nifty piece of kit when you combine it with a Cintiq.
First things first…open Photoshop (and it has to be CS3 extended version, otherwise none of this will work), create a new document (whatever size you want…I use various depending on what I’m doing, usually 1280x800 and 150dpi) and make sure the animation palette is open and in TIMELINE mode.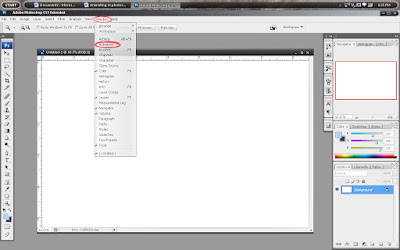
In this mode each layer is frame and you specify how long it appears for…1s, 2s, long hold etc. You can also have a layout as a layer which is the length of the timeline…kinda handy…or even a model sheet layer for reference. You can change the length of you shot by going into the document settings and just changing the frame length...you can also do other bits and pieces with this pop up menu...explore!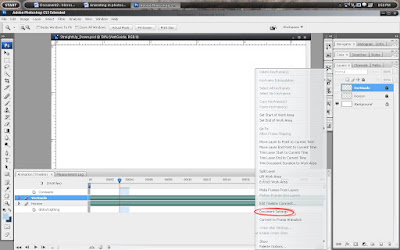
Anyway, everytime you create a new layer you are essentially grabbing another piece of 12-field and sticking it to the old peg bar…in laymen’s terms it’s another piece of paper. The thing with this is you have to treat it like paper to begin with. One layer, one drawing. Onto an favourite excercise...a right of passage for near enough every animator if you will…the good old bouncing ball.
So now it’s just like animating at a table, every new layer being a new piece of paper. So go on, get your dopesheet out and start animating…hopefully you don’t need me to tell you how to do that!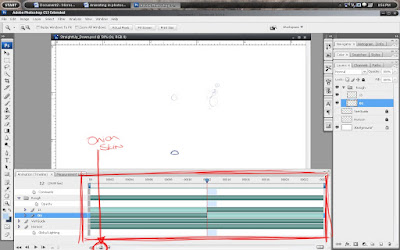
Once you have done the keys then you can put them in place on the timeline and begin the breakdowns and inbetweens. This is around the point that I start putting all the rough frames into the same group…it makes it easier later on.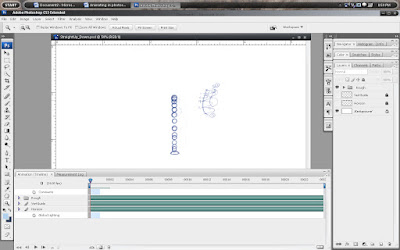
And after you have your roughs done (and are happy with them) collapse the group to make it a bit easier on the eyes. Now comes something which is a bit more confusing, if you plan to get beyond the rough stage. You can create a VIDEO LAYER.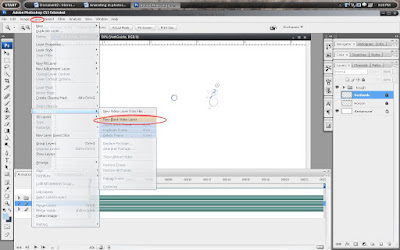
Basically this does away with having the need for separate layer/separate frame, and you could actually use is to animate straight ahead if you wanted. Create one and then have a blast doing clean up frame by frame and keeping it all on one layer! If you have 2s or a hold then you can duplicate a frame easy as.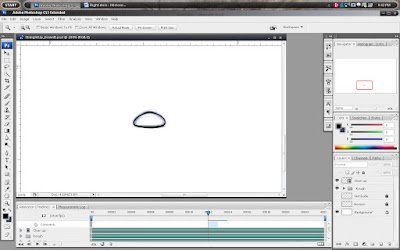
Once you are all finished, go to File>Export>Render Video. That should bring up a dialogue allowing you to export as an image sequence (so you can put it into after effect or whatever) or just do a straight QuickTime file.
Hope that helps someone out there. I know it’s only a start point, but it’s a pretty basic technique and works fine for me and keeps it close to the way I worked with paper.
Good night!

ssup sir!
ReplyDeleteI'll drop you a proper email, but for now, thank you for the welcome to the world of blogs!
Its so good you're at Aardman!
Work here is going well - ploughing on!
Can't wait to catch up!
L
Thanks, Ashley!
ReplyDeleteIt's good to get a peek into your animating workflow.
Love the giant sheep. Hope you're having a blast at Aardman!
Hey,
ReplyDeleteI just found your blog (quite surprising really, just 'surfed' which doesn't normally work nowadays!)
Anyway, I'm interested in this Photoshop animation thing...only when I had a play it was a right pain. But you seem more game for it?
So let me just see if I've got this right. When I did it, you draw each new frame on a new layer (which is fine) but when you do it creates a layer the length of the timeline, so you have to go in and individually set the length of each frame..? Even that wouldn't be so bad if it were just for keys and breakdowns like you said, but when you convert to video layer, don't you have to do all that messing about with layer length/time when you clean up?
Just interested. Great artwork though!